Showing posts with label building science. Show all posts

Friday, 30 October 2015

We need new testing procedures for insulation to show the full story.

Hey folks, Sorry it has been so long since last posting. Been busy on the house construction. I do keep a project journal and update it weekly at theEnclosure or you can click on the updates listed on the right side of this blog.

I should have a technical update for you soon where I review all of the products/methods I used in constructing my basement.  In the mean time, I wanted to expose my readers to an excellent article written by Rockford Boyer of Roxul.  In it, he identifies the risks of using a set insulation R-Value in your modelling as with many products, the resistance to heat loss changes depending on temperature.

 The Theory of R-value Relativity: The impact of thermal conductivity on building enclosure durability

 By Rockford Boyer, B. Arch. Sc., BSSOWhen designers are deciding which insulation products to specify for a given project, two questions come to mind: ‘What is the R-value?’ and ‘What is the permeance?’


 One of the things that caught my eye was the danger faced, when modelling in WUFI, of getting erroneous results.   I have extracted two of the tables and shown below.  As you can see, there is a huge difference between the reported results.  Fig 1 is using the material  from the WUFI database and Fig 2 is re-running the material with a material properties entered manually and based on actual testing.  The risk if you are not aware of these issues, is designing an assembly that in real life will act nothing like your model.  If you are lucky it will be better than the model but in most cases it will mean you have a higher risk in your assembly than designed for.  A risk that may overwhelm the assemblies ability to recover.

Fig. 1 Extrapolated R-Value based on WUFI material database.

Fig.2 Extrapolated R-Value based on actual lab testing

Wednesday, 15 October 2014

Does PassiveHaus make sense?

Just a short update to showcase an article at Green Building Adviser that perfectly sums up the conclusions I made about the Passive House program and why I cancelled my plans to build to that standard.

The author of the article, found at www.greenbuildingadvisor.com/blogs/dept/musings/it-s-not-about-space-heating, tracked the actual energy use of several homes in Massachusetts and has determined that even a modest investment in insulation and air tightness (termed a pretty good house by Joe Lstiburek) is more than enough to reduce the heating and cooling loads to the point where it makes more sense to concentrate on plug and domestic hot water loads as is shown in the below graphic.


Extracted from http://www.greenbuildingadvisor.com/sites/default/files/images/Rosenbaum%20-%20Graph%20of%20Eliakims%20Way%20data%20copy.preview.jpg

The real world data monitoring has also shown that the assumptions made in the PHPP (the modelling system for PassiveHaus) are often wrong.  The author states, “PHPP assumes 6.6 gallons [25 liters] of hot water a day per person, but that’s not enough for normal Americans.”

I jumped on board the PassiveHaus train for about a year in the early design stages of my upcoming build.  It was easy to be swept up in the well polished program and fall in love with the projected savings.  But as I became better and better educated on building science, source energy, and embodied energy, I felt their were huge holes in the program.  The underlying principles of air tightness and thermal bridge free construction were sound, but in my view the chase for heating and cooling reductions bypassed the sweet spot where it made much more sense, from an embodied energy and a cost point of view, to look at on site production than further reduction. The biggest stumbling block was the claimed 10-15% added build cost to reach PH when in reality it is much closer to 200% on average when comparing to a code min house (which after all is what the majority of homes in North America are built to).

In the end I decided to build a "pretty good house" and will monitor energy loads once occupied and then model whether or not I reached the sweet spot between reduction and production.

Thanks for visiting.  For the current status of the build please visit http://www.theenclosure.ca/project-journal/

PS: For an excellent article on why  more insulation is not always better, read http://www.greenbuildingadvisor.com/blogs/dept/building-science/diminishing-returns-adding-insulation

Friday, 28 March 2014

Variance Approved and Website Launched!

Wow, a lot has happened since my last update. 

For starters, we have moved.  You can read about the first few days of the move over on my journal at theEnclosure.ca It was a tiring and stressful time that I am very happy is behind me. Of course this was followed up by a week of sickness and a computer data loss that was the worst I have had ever experienced but fortunately I have been very lucky in this regard and so this was not crippling for me (just expensive - the whole affair cost over $1000 for data retrieval and the purchase of a second battery backup so both my Raid servers are protected).

The next piece of big news is that our Development Variance permit was approved last Monday night.  This was such a relieve after months of back and forth with the District.  They accepted my originally proposed upper to lower floor ratio of 87% (vs. the 75% required by the bylaw), but I had to redesign the roof so that I could lower it 12" and now only be 8" above the requirement of 26'.  This has resulted in the loss of my air barrier design utilizing a torch on membrane, so I will have to come up with a new game plan for creating a durable and effective air barrier at the ceiling location. Ideas anyone?

We have also been approved for our Construction Mortgage and I am thankful for the hard work put in by Tetyana Thomas at the Royal Bank.  They have really stepped up compared to most banks that would not loan to an owner builder. The challenge will now be to get to the first draw.  They will not advance funds until the foundation is complete.  This will cost well over $100K to get to with all of the permit and engineering costs built into this phase. I am still not sure where this money will all come from and we are going to need to do some MacGyving to get through this stage.  The ironic part is that they are then willing to advance 40% of the land value at the first draw which is ALL of the funds I will need to finish the project.  The appraised value for the finished structure is over $2M in today's market and they felt I should be spending over $800K to build.  I expect to spend less than half this due to my own sweat equity, salvaged materials, sponsorship, and a lower importance that both my wife and I share towards the 'lipstick' of a house.

Yesterday, I also received the final sealed drawings from the Structural Engineer and the GeoTech report.  This is the last part of the puzzle needed to apply for the Building Permit which I will do next week. Unfortunately the first appointment available was Thursday as I will be at a THERM training course all day Monday and Tuesday.

The gas/storm/sani/water services should all be disconnected next week and I will have Hydro swing the electrical service over to the new temp pole as soon as I finish installing it and call for inspection.  I hope to get this done this weekend.

But the greatest achievement was the launch of the project's website theEnclosure.ca I cannot thank Honeycomb Creative enough for their work on this site.  It is first rate just like all of the other work they have done for me.  I invite you to stop by and browse through the information that is available including a full copy of the plans, building assembly descriptions, and lets not forget the 'live' (actually snapshots updating every 3-5 seconds) video of the build site.

As I get caught up, I will post more information on the Varriance process for those that may need to go through a similar process.

As always, thanks for stopping by!


Sunday, 26 January 2014

Rotting OSB - Why I refuse to perform rough-in construction during the winter!

I regularly go by a construction site where a friend of my neighbor is the G.C.   This house in out by the ferry terminal in West Vancouver and when done will be a very high cost home.

My latest visit reminded me of why I really do not want to expose my build to the winter rains.  In fact, I will try to keep all rain of the structure until closed in by installing a 60ft x 100ft tarp over a metal cable strung between two large trees.

But back to the visit, I have been visiting this property since before the old house got taken down, and in fact this is where I salvaged very nice cabinetry to use in the walk in closet, master bath, and family entrance as well as a new wall oven and a like new drawer dishwasher.  I also was able to salvage a lot of plant material from the property but so much more got left behind with the thinking it was out of the way, when in reality - they have just been trashed, such a shame.

Cabinet salvaged to be used in Master Bath

Gorgeous drawers and storage for Master Walk-In-Closet

Base cabinets to be used for family entrance
Wall cabinets to be used for family entrance
 But again I digress.  The new house has been under construction since the middle of May 2013.  The roof was installed sometime in December, but as of yesterday the majority of windows still have not been placed, and as the main floor living areas is 100% windows, the structure is very much NOT waterproof and has been subjected to many storm events leading to total saturation.  And the structure is starting to show its distress accordingly.  I noticed these symptoms a couple of weeks ago when there but was only able to return with a camera yesterday.


This dwelling is still at the rough in stage and is showing rather significant surface mould and rot fungi.  These OSB webs are now compromised **A conversation with someone much smarter than me indicated the webs should still be OK as long as this is dried out and cleaned off **.  Not only do I want to prevent this wetting with a tarped site, this is a perfect example of how poorly OSB stands up in wet environments.

 In the end, this will probably get cleaned up as the G.C. is quite conscientious, but normally, this would just get closed in and the occupants would wonder why their floors bounce a little more than they should.

Friday, 24 January 2014

January Update - Slowly we are proceeding.

I am getting a few questions as to where I am at on the build and so will provide this short update.

We are getting there! OK, that may have been too short.

Currently, we are waiting to hear if our development variance will be approved.  The notice went out to the neighbours between Christmas and New Years (Many Thanks to Erik at the District of North Vancouver for getting this out so quickly).  The neighbours had till Wednesday to respond with only one neighbour providing official comment (positive).  The next step is for staff to write the report to Council and for Council to deliberate on the application at the next available meeting.  This currently is scheduled for Feb 17 (I today found out it is too tight to make the Feb 3 meeting which is disappointing but totally understandable).

Back in November when I was discussing this Variance with staff, I was under the impression that they would allow me to apply for the building permit in advance of the Variance permit approval and proceed on the condition the variance is approved.  I found out this week, that I had it wrong, and that I cannot apply for the building permit until after, and if,  the variance has been accepted.  This news filled me with disappointment as I was budgeting 8-10 weeks for building permit approval based on previous conversations.  However, the kind District Plan Checker has advised they will do their best to fast track the application and could complete the process in as little as 2-4 weeks.  This would end up putting me slightly ahead of schedule.

The District staff have also confirmed I can apply for the demolition permit at any time.  This will again help, as regular readers remember, I plan to dismantle the existing dwelling by hand and reuse, sell, give away, or recycle/salvage as much of the materials as possible.  I estimated this process was going to take a month to complete.  Current plans are to move out the first few days in March, spend a couple of weeks dealing with all of 'my stuff' in the garage and attic and storage shed, and then start tackling the dismantling of items like flooring, cabinets, end the like, all stuff not controlled by a permit.  I would then schedule the services to be cut near the end of March and then start on the official 'demolition'.  These efforts would all take place in advance of the building permit and further improve my schedule.

I am also nearing completion with Tacoma, the structural engineers I hired.  This process has gone on longer than I believe both Tacoma and I expected, but we have made excellent progress and I believe are getting to the final drawing edits, having been through all the drawings at least once to date.  There has been a struggle with my desire for a thermal bridge free envelope and Tacoma's desire to ensure the dwelling stays standing for decades to come, that has been worked out with lots of 1 and 0's flying through the internet email pathways, and I am grateful for Tacoma and specifically Heather's patience through this process.  In the end, it is difficult (impossible?) to build a thermal bridge free structure utilizing 2x4 wall construction, and while complying with zoning requirements, and I have had to compromise in several areas in order to allow us to proceed with permit drawings in any reasonable time frame.  There are a few areas I will try to 'upgrade' after the permit process, but will only be able to do so if ROXUL is able to provide some compressive strength testing results for their insulation in a 6" wide configuration (what I will have as continuous insulation on the exterior of the sheathing).

As you recall I recently completed a proposed plumbing waste pipe design and am now waiting for the licensed plumber to approve or adjust as required.

I also recently commissioned EcoLighten Energy Solutions to complete a room by room heat loss calculation that I will then use to design my radiant panels.  I will speak to this a lot more in the future, but it is my feeling that the method I was taught as part of the TECA Residential Hydronic Designer course, is too crude for high performance homes.  I plan on doing a comparison between that which EcoLighten provides and that completed using the TECA method, and will post the differences here.  The preliminary model from EcoLighten shows that I will use around 50% of the energy used by a 'code built' home.  With the levels of insulation and air tightness I planned, this is actually a disappointing result, as I was hoping for something closer to a 70%+ reduction. I will go over the model in the upcoming weeks and see if there are any assumptions that can be tweaked to represent what I believe will be the final reality.

I have also commissioned HoneyComb Creative to build the project website.  HoneyComb created my home inspection website and were an obvious choice to approach for my build needs.  The website www.theEnclosure.ca should be 'live' in approximately 4-8 weeks with at least the basic functionality, and then will be fleshed out as the project proceeds.  The site will include 'live' video, time laps photographs,  a link to this blog, a daily project diary, special component installation videos, dwelling design details, sponsorship links with promotional literature for sponsored products, and finally information and basic instrument readings for the science lab (once the dwelling is complete).  I am looking forward to the site launch and have been very pleased with the initial artwork provided.

Well, I believe you are caught up.   I will be posting documents pertaining to the variance application and the permit application, including all drawings, as I get through those hurdles.

As always, thanks for reading!  Please drop me a line if you have any questions or comments.


Saturday, 11 January 2014

SENWiEco adds a weather station.

As part of the instrument package for the new build, I have installed a Vantage Pro2 Plus weather station.  I have had this recording weather since September of 2013, but only setup the web based access today.

My blog will show the current conditions, but clicking on the icon will take you to the station on the Weather Underground website where you will be able to look at historical data.

The station is currently uploading saved data and should be 'live' by tomorrow.

Enjoy!


Thursday, 19 December 2013

FPInnovations - Guide for Designing Energy-Efficient Building Enclosures

Whether you are designing single or multi-family dwellings, this Wood-Frame Multi-Unit Residential design guide  from FPInnovations is packed with valuable design information and the relevant science behind each design.

Sponsored in part by the Homeowner Protection Office and prepared by RDH Building Engineering, the 244 Page guide contains information on building energy efficient assemblies in various configurations including split insulation, double stud, mass timber, and wood frame infill.


While I chose to not build to any of these specific assemblies in my dwelling, my design still relies on the fundamental principles expressed and recommended in this guide.  I have also had the privilege of attending many of the lead author's (Graham Finch - RDH) building science courses and seminars over the last 3 years.  His knowledge and ability to disseminate the information in an understandable manner has helped me immensely in my ability to absorb and understand the key building science principles discussed throughout this guide, including the importance of assemblies that can perspire, as well as the importance and impact of reducing thermal bridging.

Whether building a code minimum house or going to the other extreme and building a Passive House, this guide has got something for you and should be part of your reference library.

I give it two thumps up!

Friday, 29 November 2013

Variance Required!

Well, it is probably time for an update on the project.  I know it has been some time since I provided specifics on the project itself. On the whole, things have gone quite well.

The work that Heather and Nathan have been doing at Tacoma Engineers has been first rate, and we are nearing the end of this challenging design. I have been so happy with my selection and waiting until I found the right match for this project.  Much of the difficulty lies in my inexperience with structural design and building design in general, and the fact that I am both designing and drawing up my own house plans for the first time.  I have taken blueprint reading and design courses in the past, but there was still SO much I did not know. Tacoma has been great at coaxing a more professional looking drawing package out of me (which I will post soon).

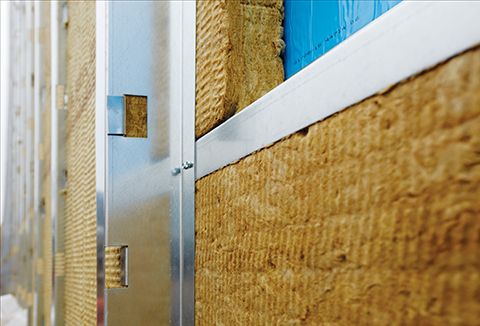
I also appreciate the patience shown by Tacoma as I aim for a dwelling with limited thermal bridging.  Turns out limiting thermal bridging and structural requirements do not play well with one another and this has been trying for all involved.  What has been a pleasant surprise is that my ‘gut-thumb-in-the-air’ engineering has been very close to acceptable.  I personally designed most of the floor truss and beam layout and Tacoma has only needed to size the beams that I proposed.  There have been a few extra beams required in the design, but nothing significant.

Contrary to the demands of the first engineer I hired in March, I actually do have a predominately 2x4 house structure (my taller gable walls had to be converted to 2x6 as did some interior bearing walls).  This was important to reduce cost (a 2x4 is about 60% of the cost of a 2x6), reduce the embodied energy of the dwelling by building in less overall material, and most importantly - would allow me to utilize the salvaged 2x4’s from the house we will tear down.  The used studs will not be tall enough for full height wall studs in the new structure (I have taller ceilings – 9ft first floor and 8.5 for the second floor), but they will probably meet 100% of the need for less than stud height lengths used as jacks, cripples, and general blocking.  This will significantly reduce my costs and divert a very large volume of materials away from the landfill.  The drawbacks with 2x4 framing is that you require 16” O.C. (may have needed some of this even with 2x6 construction based on loads), and a 2x4 stud has a lot less resistance to wind loading and therefore you require a larger volume of king studs around openings.  I am currently working with Tacoma to reduce this (possibly with the use of stronger – engineered wood posts).

Drawing up both the architectural as well as structural plans (Thank-you Tacoma for allowing me to do the structural plans and save some additional costs) has been a monumental task I was prepared for on some levels but not fully expecting.  Not counting the deign work done over the previous 2-3 years, I have put over a 1000 hours into the design, 3D model and 2D Drawings since July of this year.  I have basically been working 15+ hours a day, 7 days a week, for the last three months. Things finally settled down this last weekend when I drafted the final structural drawing for Tacoma and now only need to process drawing mark-ups and revisions.

As we were close to being finished, I contacted the District for my pre-permit review of my plans and documentation.  I was assigned an appointment time of 11:00 AM on November 27.  Heather at Tacoma stepped up yet again and even came in on Sunday to work through the mark-ups on two of the more significant drawings.  I was so grateful!  Well the meeting was two days ago, and because I really did not know what to expect, I was both encouraged and disappointed all at once.  The first few minutes went well although I could tell that the District staff were not overly impressed with the details missing from some of my architectural drawings.

But then I blurted out that I was not in compliance with the zoning bylaw and would be applying for a zoning variance.  You see, I have planned since pretty much last fall’s design iteration, that I would be applying for a variance on the requirement to make the upper floor only 75% or smaller of the size of the lower floor.  I was going to ask for permission to make my lower floor smaller than allowed to ensure I had a more compact envelope (limiting exterior wall surface limits your heat loss), to allow me to more easily comply with the new code required seismic braced wall panel rules (and the need for additional internal braced wall bands when you have the setbacks needed for a smaller upper floor), and most importantly, to allow me to design the house around our 4 magnificent 125ft+ mature cedars that hem in the south and west sides of our build lot.

At first the tone was feeling like, that would be too bad and I would be expected to take the trees down to make room for a larger first floor.  I was told that the Zoning Variance Board was particularly steadfast against any form of variances at the present time, and that my application would probably be refused.  As you can imagine, this was fairly distressing, and due to a family member’s pet emergency the night before, the 4 hours of sleep I had that night did not prepare me well for this enlightenment.  One good idea that was raised during that part of the conversation as a possible plan B, was to build a 300 sq.  ft. veranda on the back of the house which would bring me into compliance with the first floor size requirement needed to meet the ratio. This will probably be what I will do if my variance request is denied.

Then the real shocker kicked in as we continued to check the plans, my overall roof height was too high!  On the surface it looked like both my north and south upper roof ridges were too high.  As I had worked a month on these roofs to make them work with the thickness needed for structure and the insulation levels planned, and to ensure enough room for the smallest height windows Cascadia make in an operable lite for the Clerestory, this was very upsetting and for a while I just did not want to accept it.  I had met with District staff in March and thought I had a clear understanding of the bylaw rules, but obviously I did not.  Now things were looking very grim as to any chance of approval by the Zoning Variance Board.  The staff member I was meeting with brought in others into the conversation, including some from the planning department.  They discussed possible options that may be available to me.  They agreed that as far as my floor ratio violation,  my design met the intent of the bylaw (which is to promote interesting – non box architecture) even though it did not meet its technical specifics.  I also had the impression they felt the roof infraction was fairly minor in nature.  

This below PDF shows in yellow the portion of my roof assembly that is not in compliance with the bylaw.  The other hatched lines show the larger massed roof I would be allowed to build if I went to a steeper pitch.  Fortunately, when I got back home and measured, only the steeper north roof was not fully in compliance with the bylaw.

I was thoroughly deflated by this point until a suggestion was made to go for a Development Variance instead of a Zoning variance.  Development variance decisions are made by the elected Council, and the Councillors have greater leeway to grant exceptions in the light of special site conditions or design goals.  The application states "Development variance permits are normally considered where specific site characteristics or other unique circumstances do not permit strict compliance with the existing regulations."  This was sounding promising and I got the feeling that the staff felt my chances of success with this process would be pretty good with a comment from the planning staff that they would have no concerns passing the application to Council for their approval.  SO, it seemed that I was already through the first gate.  Things were looking up.

The final checks focused on the existing shed we have at the back of our property.  It is larger than allowed by the zoning bylaw and also a bit to close to two of the property lines.  In the spring, I was counselled by staff to confirm this on the plans as an existing accessory building that was not being changed in any way and that it would probably be fine. The staff went away to discuss this and when my reviewer came back, she advised that I should include this in the variance request to 'legitimize' the existence of the building and that if for some reason, I did not go for variance or my overall variance was denied, they would figure out another method to allow it to stay in place.  I have maintained it over the years and I was going to use it to build a plane with my neighbour a few years back.  I then was going to use it as a very small wood shop but now that I will be building a full sized wood shop into the basement of the new house, I will probably just use this shed as a garden shed to store my law tractor and other yard tools and garden equipment.  It used to be heated with a gas boiler, but this was recently decommissioned.

I left the, close to two hour, meeting yesterday feeling a bit beat up but at least optimistic.

I spent yesterday morning updating details on the drawings of concern to the staff and emailed that over to her.  I then received the Bylaw Compliance Checklist back from her late afternoon on the same day identifying the 4 items I need to get a variance for.  I spent yesterday afternoon and evening drawing up the PDF shown below and drafting a letter I will send to the neighbours, once again asking for their support.  All 8 neighbours that are adjacent to the front and back of my property will be sent an official survey by the District and asked to indicate their support or opposition to my requested variances.  I have been encouraged to contact them in advance to explain the rationale behind the variance requests and ask for as many letters of support as possible.  I will distribute my info letter to them this weekend and will aim at applying for my variance on or before Dec 13 so that I have the best chance of being able to present my case to Council at their February meeting.

I was told that staff could possibly look at starting to process my building permit application in advance of the Council approval on the assumption that it would be approved.  I was also told that I could apply for the demolition permit at any time and it was recommended I do this about 4 weeks before I wanted the services disconnected.  This was very good news that gives me a good chance of not only being able to stay on schedule, but possibly even being able to start earlier than planned.  As we plan to move out March 1, we could have the service cut anytime after that and start the dismantling of the existing structure during March instead of after the planned April 8.

Next few weeks/months will be exciting as I finish off with Tacoma and prepare the full drawing package for submission with my variance application.  I will then need to move on to the plumbing, electrical, and most important HVAC design.  These are all a separate permit process and therefore a different time requirements.  The plumbing will be the first permit application needed right after the building permit (the drains need to go under the footings) and then the electrical application would follow my  rough-in construction inspection.  Then would come the HVAC.  At this point, I do not plan to connect gas to the house which will save us connection fees, permit fees, and monthly utility connection fees.  This may change after the HVAC design, but at this point I hope to utilize an air source to water heat pump for both my space and domestic water heating needs.

Well, now you are all caught up.

Wish me well and thanks for reading!

Sunday, 3 November 2013

Thermal Bridging and Dew Points


Anyone who has heard me speak for more than 10 minutes has probably heard me talking about dew-point potential.  It is at the heart of good building science principles.  Move the dew-point to somewhere outside of your assemblies, and your assemblies will have a built-in safety regardless of any air movement through them.

But for many, this dew-point conversation is esoteric and abstract, they can not usually visualize a dew-point occurring (that they are aware of, the condensation on the outside of a glass or can of cold liquid is a demonstration of dew-points) and so cannot appreciate the importance of reducing its potential in building enclosure construction.

Well by happenstance, I had an excellent example present itself to me at my home this afternoon.  I was coming back from my neighbour’s house after ‘supervising’ the dismantling of some scaffolding, when I observed condensation on the inside of the window near my front door.  Now, I generally have single pane heavy aluminum frame windows throughout my home, so condensation around the frame margins of the windows is not an unusual occurrence.  However this window had a wood frame (site built) and did not usually suffer from condensation.

Why the difference?  Insulation and air films!

Condensation spotted on the inside of the window.

Inside of window is condensation free except behind some mail propped up against window.

Condensation is definitely on the inside face of the window.
General window surface temperature 56.5° F
Surface temperature drops to below 51°F behind the mail.

Temperature in nearby region is 68.1°F

Temperature behind mail 56.4°F with an RH of 64%

So, what does this all mean? 

I have to admit, that this took a lot longer than it should have to figure out.  On the first round of measuring, I had RH levels well below 50% and temps of 66.3°F ‘near’ the window (my office is at 44% and 72°F on the other side of the house and benefiting from all the heat being pumped out from the computer equipment). At these windows temps and RH, the dew-point should have been around 47°F which was clearly well below my initial recorded window surface temp of 53°F behind the mail. 
So why the condensation? 

It then occurred to me that this was a delicate microclimate and by removing the mail for too long to do the testing and photos,  I had inadvertently changed the local conditions and disturbed the air film that would have been against the surface of the window.  So, I put the mail back to let the conditions come to equilibrium again and reran the measurements to get the figures in the photos above.  As you can see, the temperature within a couple of ‘ft’ to the window was now over 68F and the humidity that was building up behind the mail was over 64%.  This works out to a dew-point around 56°F and with a window surface temp of just under 51°F, I was well below the dew-point and had condensation.

The mail was creating enough of a barrier to heat loss (acting as insulation), that it was lowering window surface temperatures over 5F and at the same time was creating a micro-climate where the humidity was ‘trapped’ by still air and building up well above the rest of the house.  

This demonstration highlights how delicate the balance can actually be and why heat-bridging in assemblies is so critical.  Whenever you have isolated conditions that allow a small area of your assembly to cool in relation to the assembly as a whole, or that allow the build-up of humidity, you have the recipe for  liquid water formation and when hidden inside an assembly, that can and often does lead to disaster!