Wednesday 12 November 2014

Choosing Materials

The green building movement makes a big deal about choosing the right materials to ensure a product can be reused or returned to the raw material market at the end of the life-cycle.  The end goal is of course to reduce the embodied energy of the project.

While this is a lofty ideal and worth pursuing, a reality check often shows that while a material is technically recyclable, there often (usually) not programs in place to actually process the used material.  During the deconstruction of my house, I ran into two good examples.

My kitchen floor was pure linoleum tiles (essentially linseed oil).  This is a product that can be composted or used as fuel for large scale heating boilers.  But in my region, there was no program set up to process the product and I ended up taking it to the landfill (I did not have the facilities to grind up and compost myself).

The second product I failed to recycle was all of the plastic pipe I salvaged from below grade.  This included PVC drainage pipe, PVC irrigation pipe, and ABS sewer pipe.  For this commodity, there was a program in place to recycle the material, but only if it was VERY clean (think like new).  The process available could not handle pipe with any dirt or other sediment on it.  SO in the end, it too had to go to the landfill.

Misc Pipe and Plastic that was not accepted at recycling facility.


While we should endeavour to reduce our footprint on the planet and choose materials with lower embodied energy, we should also ensure that the materials we do choose are the most suited to the application.

I see too many 'green' building designs that choose a 'green' product due to a promised carbon footprint as the primary focus, without ensuring the product will be durable long term in service. This often will result in the need to replace the product after a very short life cycles.  Even if the product can be returned back to the raw material supply chain, this still represents an increased burden on the planet compared to a competitive product that while being less 'green', is more durable in service.  And if the 'green' product cannot be returned to the supply chain, you are just that much further behind.

Instead, my focus is to start at the most durable end of the spectrum and then try to pick products with lower embodied energy characteristics from the high performance candidates, AND install the products per best practices to ensure they are as useful and durable as possible.

My long term hope is that the cost of new materials becomes so high that even the main stream players in the market see recycling as a no-brainer.  This would address the fact that right now, recycling often does not make sense from strictly a financial platform.  However part of the problem is also the technical challenges in recycling a product.

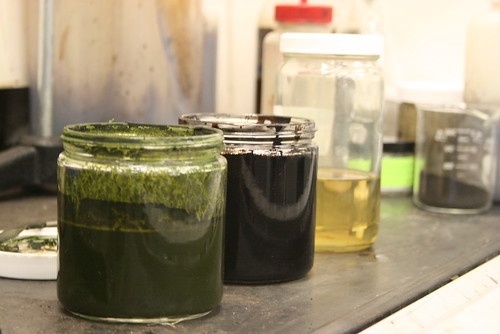
Fortunately, there is some visionaries that have been working for many years to solve some of these hurdles. Mike Biddle has been working on a system that can separate bulk shredded plastics into the different colours and materials solving one of the biggest stumbling blocks to mass recycling of plastics (read PopSci article for full storey).  The beauty of his system is that this is all done in N.A., saving the need to ship offshore, via an automated process (no high labour costs). By keeping the product on our shores, we reduce the pollution our society is creating within poorer countries.

Lets hope others are working on the myriad of other materials we as a society currently just discard.

Mike Biddle has developed an automated (IE cheap - labour free) method of allowing plastic materials to be ground up on mass and then separated into the individual colour and materials making up that mass.

Wednesday 15 October 2014

Does PassiveHaus make sense?

Just a short update to showcase an article at Green Building Adviser that perfectly sums up the conclusions I made about the Passive House program and why I cancelled my plans to build to that standard.

The author of the article, found at www.greenbuildingadvisor.com/blogs/dept/musings/it-s-not-about-space-heating, tracked the actual energy use of several homes in Massachusetts and has determined that even a modest investment in insulation and air tightness (termed a pretty good house by Joe Lstiburek) is more than enough to reduce the heating and cooling loads to the point where it makes more sense to concentrate on plug and domestic hot water loads as is shown in the below graphic.


Extracted from http://www.greenbuildingadvisor.com/sites/default/files/images/Rosenbaum%20-%20Graph%20of%20Eliakims%20Way%20data%20copy.preview.jpg

The real world data monitoring has also shown that the assumptions made in the PHPP (the modelling system for PassiveHaus) are often wrong.  The author states, “PHPP assumes 6.6 gallons [25 liters] of hot water a day per person, but that’s not enough for normal Americans.”

I jumped on board the PassiveHaus train for about a year in the early design stages of my upcoming build.  It was easy to be swept up in the well polished program and fall in love with the projected savings.  But as I became better and better educated on building science, source energy, and embodied energy, I felt their were huge holes in the program.  The underlying principles of air tightness and thermal bridge free construction were sound, but in my view the chase for heating and cooling reductions bypassed the sweet spot where it made much more sense, from an embodied energy and a cost point of view, to look at on site production than further reduction. The biggest stumbling block was the claimed 10-15% added build cost to reach PH when in reality it is much closer to 200% on average when comparing to a code min house (which after all is what the majority of homes in North America are built to).

In the end I decided to build a "pretty good house" and will monitor energy loads once occupied and then model whether or not I reached the sweet spot between reduction and production.

Thanks for visiting.  For the current status of the build please visit http://www.theenclosure.ca/project-journal/

PS: For an excellent article on why  more insulation is not always better, read http://www.greenbuildingadvisor.com/blogs/dept/building-science/diminishing-returns-adding-insulation

Sunday 31 August 2014

Sub Slab Insulation - EPS vs XPS

Update November 2017

Since first writing this posting, my viewpoints have updated based on additional gained knowledge.  While I still believe that XPS wets up slower than EPS, I now know that both will wet up in the long run in damp environments. So drainage below (sub-slab) or along (vertical foundation) is key to keeping these products performing well. 

When choosing between the two products, I also agree with the recommendation by some to just increase the thickness of EPS by  20% to account for R value loss when wet.  This is based on the fact that EPS currently has a much better environmental footprint over XPS.

And indeed this was the direction I had planned to take on the house I am building.  But then I found out that ROXUL had approved its mineral wool insulation for sub slab installations.  This represents an even better alternative to rigid foams.  Mineral wool is free draining, has a smaller environmental footprint (especially ROXUL that is produced using electricity from a nearby Hydro Electric dam), and is hated by insects and rodents (relevant for vertical installation on the outside of a foundation).   ROXUL recommends their ComfortBoard 110 product for this application. 

While I now plan to use this product below my slab, I still feel that long term unbiased testing of the typical sub slab insulation options would still be of value to the building industry.  This is why my house currently under construction will now include a sub-slab lab comparing XPS, EPS, and ROXUL.  We will look at wet-up, R value loss, and compression of these insulation's over many years under real world conditions.  The slab will include removable panels allowing access to the insulation below.  Details for the lab can be viewed at theEnclosure.ca


Original Post

As some of my regular readers know, I tested samples of EPS and XPS in an underground wet environment to see which over time absorbed more moisture.

I described the experiment design in my blog posting of Aug 22, 2013 and describe the start of the experiment in my posting of October 6, 2013.

Fig 1: Samples at beginning of experiment.  These were buried below aprox 4 ft of dirt in a wet environment subjected to regular/constant ground water.
 I dug up the samples March 25, 2014 and the results do not look good for EPS.


Table 1: Weight of buried samples at end of 9 months.
As you can see in table 1, over the same period of time and in the same conditions, EPS absorbed an average of 258% of its original mass in additional water compared to only 31% for XPS.

Once I finished my on-site testing of the samples, I then took them all down to Fitsum Tariku, an instructor at BCIT and Director of Building Science Centre of Excellence (to name just some of his many accomplishments and titles). Fitsum offered to have some of his Masters students in the Master of Engineering in Building Science program run some experiments to determine the total moisture take-up potential of both products as well as the thermal resistance once saturated.

Unfortunately they were unable to use my buried samples because they were too damaged (I should have bed them in a thicker layer of sand both below and above to protect the integrity of the samples - however it was still a very revealing test based on my results in table 1 above).  Instead they used samples I had submerged in a tub of water and others I had on a shelf during the experiment.

In the following tables, you can see that EPS also does poorly from a R-Value retention point of view when saturated compared to XPS.

Table 2: Dry weight of samples measured by BCIT
Table 3: Measured R-Value (using Hot Box) of both dry and wet samples
Table 4: Difference in R-Value between two insulation types both when dry and wet.
Table 5: Loss of thermal resistance when saturated.

The last graphic tells it all - EPS looses 15.7% of its thermal resistance when in a wet environment and saturated compared to only 3% for XPS.

So why is EPS used in many 'green' projects.  This stems from the EPS industries claims that it represents a lower Global Warming Potential vs XPS due to its use of Pentane as a blowing agent compared to the traditional HCFC agent used by the XPS industry.  But XPS manufacturers like Owens Corning have already replaced their blowing agent with a Zero Ozone Depleting formula.

Finally, one positive recorded result is that both products met or exceeded their published thermal resistance per inch of R4.27 for EPS and R5 for XPS (as shown in table 3 - dry state). 

The outcome in our view is pretty clear cut - over the extended period representing the lifespan of a dwelling (50+ Years), the lower initial thermal resistance, and then the significant deteriorating of R value if EPS gets wet and stays wet, far out-way any environmental benefits claimed for EPS.  The obvious choice for below slab insulation applications is clearly XPS when all factors are taken into consideration.

Sample Specifications:
XPS - Owens Corning Foamular C-300 (30 psi) 
EPS - Plasti-Fab PlastiSpan 30 (30 psi) 

Sunday 10 August 2014

SENWiEco concludes testing of DURISOL ICF Block

When choosing a foundation your options are typically a site formed and poured concrete wall or some form of insulated concrete form (ICF) wall.  Early on in the process I gravitated to an ICF wall because it would eliminate the need to hire forming crews and rent and fabricate forms.

When looking at ICF, the traditional product is made from some form of EPS foam which has a very high embodied energy, lots of off-gassing, and is made from non-renewable components. The foam industry (EPS and XPS) will try to 'green-wash' this by stating the foam, as an insulation, reduces heat loss and reduces carbon output over the lifespan of the dwelling.  Yes this is true for ANY insulation, so choosing an insulation with a starting lower embodied energy will put you that much further ahead on your reduction goals. So again, early in the process I looked for a product that on the surface was friendlier to the planet.

One of the benefits of all ICF walls is that they typically require a smaller concrete core than a standard foundation.  The code allows for a 5.5" core on ICF walls where a standard site formed wall generally start at 8".  The reason for this escapes me because the ICF product itself is not considered structural so why would all walls not be allowed to be only 5.5" regardless of forming method.  If someone knows the answer to this please post a comment.  The smaller core of the ICF significantly reduces the concrete needed and therefore the cost and embodied energy of the overall wall.

One of the other downsides to a typical ICF forming material (foam), is that you end up with too much insulation on the inboard face of the core.  This decouples the core from the interior environment and can lead to condensation in some isolated cases, but more importantly it limits the walls ability to be a moderating force to the homes inside environment. An exposed concrete wall can buffer the temperatures by acting as a thermal mass.

The further downside to foam style ICF blocks is that just about everyone loves them from rats to ants.  They burrow and nest in the product creating holes in your thermal blanket.  They are also quite fragile and can be easily damaged during construction and require significant blocking during pouring to prevent blow-out.

My quest for the perfect block led me to the Durisol product.  It is made with virgin but scrap wood (manufacturing waste and tree tops).  This wood is chipped and then through a patented process, the organics are removed to create a mineralized wood fibre (think petrified wood).  This is then added to a cement slurry and formed into the ICF block.  This process and product would help meet my goals to dramatically reduce the embodied energy of the foundation.

There is another similar product made by Faswall, but my research indicated that this product utilized non-virgin wood sources like used pallets and had a lot more dimensional tolerance issues with the block itself.  I also was informed that Faswall was initially going to be a licensee of Durisol but ended up swiping the formulation and heading out n their own.  This did not sound like the right fit for me so I focused on Durisol even though it meant I would have to freight them from back east.

Once I decided to seriously consider Durisol, I then wanted to ensure it was suitable for the task. My immediate concern was that the blocks would rot.  But the product has been used for decades as sound abatement walls on highways (where some of the wall is always buried) and I received a letter from the Ontario Ministry of Transport advising that they have never had to repair a wall due to decay (just traffic accident damage).

My next concern was how would this wall act from the point of view of air and moisture movement.  It was made clear from the beginning, that I would need a independent air barrier as this product was air permeable (it has webs that penetrate through the concrete core so the core is not continuous).   So this was a negative against the product when compared to foam, but as I wanted a bullet proof building enclosure, I had always planned on an robust WRB (water resistant barrier) on the exterior of the foundation.  I think the idea of 'damp-proofing' a foundation wall in a rain forest climate is ludicrous and had always planned on Water Proofing my wall.  And a waterproof membrane is almost always also an air barrier.

My next concern was how the blocks would act if subjected to regular wetting.  The manufacturer claimed the product was unable to support capillary action and had some university testing to support.  But I was not satisfied and so set out to torture test the product over 16 months.  I started the experiment in Jan of 2013 (Begin experiment).  At the eight month mark I posted the status) Status at 8 months) and then altered the block to also contain the concrete core.  The experiment concluded on June 1, 2014.


All off my testing supported the manufactures claims.  This was a free draining assembly that did not support moisture movement from the outboard to inboard face.   I will also be preventing moisture movement through the footings via a FastFoot mebrane and also using a touch-on or self-adhered AB/WRB mebrane on the outside face of the foundation and so will have a very durable and forgiving assembly.  I now felt confident using this product on my project and have now received the product on site.  Once the excavation is complete, I will post some videos on the installation of the product (visit my project journal for the tribulations in getting these goods to site).

As I have time (may be at end of construction, I will also try to post some cost comparisons between the various options and the embodied energy numbers).

Thanks for visiting.

Thursday 3 July 2014

Clothing Charities

I was going through my notes and thought I would post the charities I researched on the North Shore (Vancouver BC) that deal with woman's clothes in case it helps anyone else.  All have worthy clients they are assisting.

http://avalonrecoverysociety.org/

http://dressforsuccess.org/home.aspx
(Clothes must be cleaned and no receipt.  They do not take casual.)

http://www.harvestproject.org/programs/thrift-store-2/

http://nscss.net/

www.northshorewomen.ca

Cheers

Sunday 15 June 2014

Missed Deadline - again!

Well as you can see by the web-cams, we are no where near ready to start the big dig.  So today's' deadline will come and go like many previous.

The deconstruction is now going pretty much to schedule, but we just did not start soon enough due to all the lost time re-engineering the structure to meet the new District policies. May was meant to be tear down month but both April and May were generally spent on re-engineering and drawing and getting the house fully empty.  This is one downside to doing ALL the work myself -  There is no overlap.  In general, I did not start this project prepared.  I had intended to purge and empty the house over the winter, but was generally fully occupied with drawing, redesign, and variance approvals.

I have pretty much given up on a schedule at this point and am just working as hard as I can each day to move forward. The actual deconstruction did not start until May 12 with the removal of the Kitchen followed shortly after by the laundry room.  We then had to prepare for the asbestos remediation. Since the remediation of the asbestos laden drywall completed June 4, I have been able to lift up aprox 650 sq. ft. of beech hardwood flooring (including grinding off nails), removed wood panelling from hallways,  removed all of the wood planking that was installed behind the panelling, and as of yesterday remove all of the non-bearing internal walls.

Front entrance at back left.   White wall used to be bathroom and back right was spare bedroom.  Wall in foreground is the central bearing wall holding up the ceiling joists.

Foreground was dinning room and stack of salvage 2x4.  Room behind brick chimney was laundry utilities and room to right was kitchen.  The few renaming posts are holding up some splicing in the ceiling joists near a roof valley above. Just visible behind chimney is a remaining bearing wall holding up ceiling joists at the south half of the house.
 Over the next week I hope to stack the salvaged wood outside (need to figure out where as really tight on space!), take a garbage and green waste run to the transfer station, pull up the sub-floors (this is plywood screwed to ship-lap, nailed to 2x4 sleepers. When we had the hardwood put in, I installed about 18 pounds of screws in the sub-floor to reduce the creaking that was present.  There is no way I will have the time to remove all of these screws to salvage any of the sub-flooring, so I will just be cutting it into 4ft x 4ft panels and taking to dump unfortunately), and then start taking off the exterior siding.  This should be much easier using the offset for the reciprocating saw I talked about on an earlier posting.

Lets see how well I do meeting this goal.

Thanks for stopping by!


Wednesday 11 June 2014

Thermal Bridging - The New Buzz Word

Just a short message tonight.  I finally got around to reading the Winter 2013 Journal of Building Enclosure Design and it was chalk full of articles on the importance of preventing thermal bridging across balcony slabs.

This is a hot topic in most BE circles right now.  Even as little as 5 years ago, most energy models ignored the thermal bridging that results at this interface, but as I wrote a couple of days ago, even though the slab only represent around 3% of the total wall area, if not thermally broken, it can easily diminish the entire walls thermal resistance by 50% or more.

The construction industry and building designers are finally listening to the Building Scientists and realizing that details really do mater!  We need to start building smarter because there are too many Aqua Towers in this world.

Thanks for stopping by and please visit my project journal often as I am posting almost daily now.

Cheers!

Monday 9 June 2014

RCI Conference

Sorry for the repeat to those that follow both my Blog and Journal, but this info was too good to miss.

Please visit http://www.theenclosure.ca/project-journal for the lunacy surrounding slab edge thermal bridging, double stud construction, and wrapping buildings in foam.

Thanks For Visiting!

Friday 6 June 2014

Removing Hardwood Floors - The easy (ier) way!

One of the tasks I was not looking forward to in the demo of our existing house was the task of pulling up the approx 650 sq.ft. of hardwood floor.  I had done some of this in the past and it was a bear.  It is murder on your back and takes for ever.

I put about 2-1/2 hours into it yesterday and did about a foot by 40 ft.  Each row was taking 5-7 minutes and based on this rate the whole living and dinning room (only part of the job) was going to take me 19+ hours.  I started again this morning and after a few rows I was second guessing my decision to save the floors. 

My back is already not the best and I knew that I was not going to last doing this the traditional way.  Almost any example you see of pulling a hardwood floor that has been nailed down uses the following tools.

Typical tools used to take up a hardwood floor.

But I had vowed on this project that I would work smarter and not harder.  I decided to 'waste' half an hour going to the lumber store to see if there was any better options.  Boy am I glad I did.  I ended up buying a 6 lb sledge on a 36" handle and a pick/axe.  Now you may be wondering how these two could work together.  They can't untill you modify them.

The beginnings of a beautiful thing.
 But by cutting off the pick, you are left with a lovely flat spot to whack the 'axe' in under the tongue on the flooring.

Finished tools work very well together
This cut the time per row down to under 2 minutes or a savings of apprx. 70%

 
This example took just under 4 minutes.  I was able to hone the method down to around 2 minutes per row.
A panel lifter is also useful but in the end, I just used my modified tool to do everything.

 The following is a time lapse of the entire floor removal.  As you can see, the timing spead up considerably with the new tools in hand.


I found that working on the individual pieces from the middle of the piece was the most effective to lifting it out. Often the grove side joint broke, but these will be easily added back with a router. And considering the increase in speed this method afforded, the extra work to put new ends on some of the boards was well worth it.  I will now look to find a labourer to grind off all of the protruding staples (I believe this will be much faster than trying to pull out with pliers).

Thanks For Stopping by.

Tuesday 27 May 2014

Support Costs and Advertising

When I started this blog exactly 2-1/2 years ago, I thought it would be a place for me to collect my thoughts, express and debate my point of view, and generally document my experiences while I designed and built a energy efficient home.

The experience has blown me away, and I cannot believe the response.  I look forward to the messages I receive weekly from some of the readers.  I also appreciate the silent majority that are in the shadows but stop by regularly.  I was amazed when after only 1 year I had 1000 visits.  I am blown away that a short 1-1/2 year later we are over ten thousand hits and I am averaging 1000+ hits a month.

Right from the beginning, I made a decision to not monetize this blog.  I did not want my readers to be bombarded with adds.  I want the hyperlinks present to be those I added - not Google. At the same time, the costs to host the content featured in this blog are starting to add up and I would like to do even more, but I really cannot afford to divert the funds away from the build.  Between websites, cameras, and camera hosting, I have spent over $6K to date and that will start to climb as the volume of content increases and I exceed both my broadband and hosting bandwidth.  I just had to upgrade to a higher Shaw 'business' service because I was exceeding my monthly bandwidth.

SO - I have made the decision to accept donations from those who feel so moved to provide.  You will see the donate button at the top right of my blog.  Any amount, no matter how small is appreciated and if you are not moved to donate - no worries - the blog will continue for your enjoyment.  I will use this money to pay my monthly hosting and camera costs and to improve the camera service.


If you do not have a Paypal account just click the  continue bottom to use any credit card.

Thank you in advance for any of your generosity!


Monday 26 May 2014

10,000 + Hits

WOW!  Never in my wildest dreams would I have thought that my measly efforts to document one persons quest to build a sustainable house would receive such a large and wide audience.

I am humbled and encouraged by your support and interest.

THANK-YOU!

Friday 9 May 2014

Working Through a Braced Wall Panel and the Cost to Protect Trees

Earlier in the week my engineer discovered a design blunder I had made on one of my Braced Wall Bands.  I had not ensured that I had a Panel starting within 2.4m of the band edge.

You can read about my fix on the Project Journal

In the meantime, I received two quotes to provide stabilization to my excavation bank around two sets of trees using driven anchors and shotcrete.  One was $30K and the other up to $45K!  I just about had a cow!!!  This is well outside my budget and is not going to work for me.

So I will need to come up with other solutions and will possible need to take down one tree (unpopular choice with me, my wife, and the neighbours).  I will work with the arborist during the air spading to see if we can get any closer to the trees without disturbing structural roots.

For the south elevation, the worst case scenario is that I will need to stabilize the bank using large concrete blocks (2.5' x 2.5' x 5').  I am told this would cost a few thousand. For the NW corner tree, my only option will be to use the blocks.  But this will only be possible if there is no structural roots where the blocks would need to go.  We would need to excavate within 1.5' of one side of the tree if we are going to be able to place these blocks there.  Otherwise, I will need to take down this lovely tree :-(    I will only find out once excavation starts.

In the meantime, I work to empty out the house and start the deconstruction.

Thanks for visiting.

Wednesday 23 April 2014

Batt Insulation - Not all are poor!

Gregory La Vardera posted this excellent primer over at Green Building Adviser on the differences between fibreglass and mineral wool batts.

As Gregory points out, ROXUL Mineral Wool batts are not associated with the typical failings of a fibreglass batt installation. This is due to the density of the product and the ease of cutting and trimming. The product also sheds water and is fireproof.

My only critique of his article is is statement "I don't need my insulation to make an air seal, because I used that good ol' housewrap on the outside. Nope, nothing wrong with housewrap — but it provides no help with the air sealing you need at your vapor retarder. The air seal in this case wants to be on the warm side of the wall, to prevent interior moisture from entering the wall cavity and condensing during the winter heating season."

This is actually incorrect, an air barrier ANYWHERE in the assembly will block air flow through the assembly.  I will talk more about this in an upcoming blog entry.  For now, I did not want to detract away from the rest of the posters review of ROXUL mineral wool insulation.

Friday 11 April 2014

Blog vs Journal

I just want to give a heads up to regular readers of this blog that I will be reserving future posting for the more in-depth postings regarding materials, processes, and Building Science.

I will be making the more regular (hopefully daily once I start building) postings, describing my day to day struggles of building my own house, to the project journal at theEnclosure.ca

You can subscribe to this journal page if you want to automatically receive the updates.

I want to thank you for the amazing support you have all shown by being regular visitors of this blog.  When I first started it, I would have never imagined I would receive over 1000 visits a month.

ENGINEERING GUIDE FOR WOOD FRAME CONSTRUCTION 2009

Looking to borrow a copy of the Canadian Wood Council's ENGINEERING GUIDE FOR WOOD FRAME CONSTRUCTION 2009 from someone in the Lower Mainland Greater Vancouver Area. 

Hopefully Saturday AM.  I have ordered a copy but it will be a week or so coming and I would like to get a handle on Part C over the weekend if possible. 

If you have a copy I can borrow, please contact me at building@senwi.ca

Many Thanks

Wednesday 9 April 2014

Death of Part 9 construction?

Never would I have guessed that the Building Permit process would be the biggest stumbling block in building your own house.  I know the building code quite well and had ensured my design complied with it.  What I did not allow for, and what may shut me down, is bureaucracy.

It seems that there is a general movement in Municipal building departments across the Lower Mainland to 'opt-out' of Part 9 construction now that this part of the code includes 9.23.13 Bracing to Resist Lateral Loads Due to Wind and Earthquake.  Whether the motivation of the Municipalities is based on fear (many may not be adequately trained on the new requirements that were enacted just last December), or from a perceived workload concern - I am not sure.  It may also be an unjustified fear of liability perceived present if they are responsible for ensuring a dwelling meets the new Part 9 requirements.

Whatever the motivation, the outcome may very well be the death of Part 9 construction in parts of BC and the significant increase in construction costs as a result.  With the added costs of an 'engineered' approach to the Lateral Load design expected to be somewhere in the $20K - $30K range )most of this would be for the added Simpson hardware utilized in most engineered designs), this 'component' has gone from $0 to one of the most expensive components within the home, on par with a high end window, cladding, or HVAC package.

For me, the removal of my ability to generally design and build my own house is similar I am sure to how some Americans would feel if your tried to take away their guns.  I have always felt it is my right to design and build my own house via the prescriptive path of Part 9 in the BC Building Code.

Yesterday, I was informed that this right is being taken from me.  The DNV building department manager has informed me that my architecture is 'complex' and as a result, they will require that the entire structure is engineered including the lateral bracing requirements.

"We consider your proposal combining part 9 prescriptive design with part 4 structural components inadequate in providing lateral support against high wind and seismic forces.


We consider this as a complex design and as such we, the Authority having jurisdiction, decided not to accept the design path and therefore require you to have a Structural Engineer design and provide signed, sealed drawings for the entire structure."

Many of you will be saying, we have combined Part 9 and Part 4 design for decades and you would be right.  In November of 2013 it would be very common to have a primarily Part 9 designed dwelling that also included manufactured components designed to Part 4.  These components would include manufactured floor joists, beams, and roof trusses.  

What changed?  Well the building code introduced lateral bracing requirements in high wind and seismic zones.  This includes the Lower Mainland of BC and the Southern Vancouver Island region.  The requirement became effective in Dec 2013 and right away a controversy developed.  APEGBC in their infinite wisdom decided that the Part 9 lateral bracing prescriptive design was inadequate to resist high wind and seismic loads.  Now of course we have decades of experience showing otherwise, but they have drawn their line in the sand and refuse to budge.

So while engineers are allowed to design to the rest of Part 9, they are specifically not allowed to use 9.23.13  and must instead design the lateral loading using the Canadian Wood Council guidelines or utilizing a 100% engineered approach (Part 4). And the problem with these approaches (granted based on my limited exposure) is that it is a LOT more expensive to build in this manner as it usually includes significant volumes of manufactured Simpson Strong-Tie hardware.  On a house under construction that I often visit, I was quoted a cost of $16K for just the anchor bolts.

Whether this controversy has influenced the building departments, I do not know, but based  on comments made by the DNV manager, many Lower Mainland building departments are getting out of the Part 9 business.  

Personally I question if this is an abuse of the Municipalities power over the code implementation and feel the need for Victoria to step in and mandate Municipal support for Part 9 design and also introduce a detailed frame work that identifies the conditions that must be present in a design before the AHJ can deem that design as 'complex'.  In short, I believe it is time for a major overhaul in how the Building Code is implemented across the Province to ensure a consistent and fair application across AHJ.

In the meantime, I urge you to specifically ask your Municipality what there requirements are going to be while you are still early in the design.  I was notified of my Municipality's unwritten policy after the design was complete during my building permit application meeting.


Thursday 3 April 2014

The End?

This has been a particularly poor day.

You can read about it on the build websites journal http://www.theenclosure.ca/?p=541

In a nutshell, it appears my dream to build a Part 9 affordable structure is coming to a close without too many options I can afford.

Really not sure what my next steps will be and ironically, my services were disconnected this morning and I do not even have the opportunity to move back in.

Time to go for a walk - Sorry for the downer but thanks for letting me vent!

Friday 28 March 2014

Variance Approved and Website Launched!

Wow, a lot has happened since my last update. 

For starters, we have moved.  You can read about the first few days of the move over on my journal at theEnclosure.ca It was a tiring and stressful time that I am very happy is behind me. Of course this was followed up by a week of sickness and a computer data loss that was the worst I have had ever experienced but fortunately I have been very lucky in this regard and so this was not crippling for me (just expensive - the whole affair cost over $1000 for data retrieval and the purchase of a second battery backup so both my Raid servers are protected).

The next piece of big news is that our Development Variance permit was approved last Monday night.  This was such a relieve after months of back and forth with the District.  They accepted my originally proposed upper to lower floor ratio of 87% (vs. the 75% required by the bylaw), but I had to redesign the roof so that I could lower it 12" and now only be 8" above the requirement of 26'.  This has resulted in the loss of my air barrier design utilizing a torch on membrane, so I will have to come up with a new game plan for creating a durable and effective air barrier at the ceiling location. Ideas anyone?

We have also been approved for our Construction Mortgage and I am thankful for the hard work put in by Tetyana Thomas at the Royal Bank.  They have really stepped up compared to most banks that would not loan to an owner builder. The challenge will now be to get to the first draw.  They will not advance funds until the foundation is complete.  This will cost well over $100K to get to with all of the permit and engineering costs built into this phase. I am still not sure where this money will all come from and we are going to need to do some MacGyving to get through this stage.  The ironic part is that they are then willing to advance 40% of the land value at the first draw which is ALL of the funds I will need to finish the project.  The appraised value for the finished structure is over $2M in today's market and they felt I should be spending over $800K to build.  I expect to spend less than half this due to my own sweat equity, salvaged materials, sponsorship, and a lower importance that both my wife and I share towards the 'lipstick' of a house.

Yesterday, I also received the final sealed drawings from the Structural Engineer and the GeoTech report.  This is the last part of the puzzle needed to apply for the Building Permit which I will do next week. Unfortunately the first appointment available was Thursday as I will be at a THERM training course all day Monday and Tuesday.

The gas/storm/sani/water services should all be disconnected next week and I will have Hydro swing the electrical service over to the new temp pole as soon as I finish installing it and call for inspection.  I hope to get this done this weekend.

But the greatest achievement was the launch of the project's website theEnclosure.ca I cannot thank Honeycomb Creative enough for their work on this site.  It is first rate just like all of the other work they have done for me.  I invite you to stop by and browse through the information that is available including a full copy of the plans, building assembly descriptions, and lets not forget the 'live' (actually snapshots updating every 3-5 seconds) video of the build site.

As I get caught up, I will post more information on the Varriance process for those that may need to go through a similar process.

As always, thanks for stopping by!


Thursday 27 February 2014

Pacific Northwest National Labratory develops a new Algae fuel ready in about an hour.

Diesel created by algae has been on the radar for a few years now but is still only available in low volume pilot plants and is heavily subsidized.  Once of the largest stumbling blocks has been the energy needed to create the dry algae used by the previous processes.

PNNL has created a process that can work with wet algae (80% water) saving vast amounts of energy and time.  Their new process creates usable crude in as little as one hour.  The process also allows for usable gas to be extracted from the waste water stream increasing the efficiency of the process even further.

This is a large step in the right direction in getting the process closer to the efficiency and scalability needed to compete with the fossil fuel market.

You can read more about this innovative process here.

The process starts with whole green algae slurry with water contents between 80% and 90% (Photo extracted from PNNL)
Under high pressure and temperatures that mimic the conditions found deep in the earths crust, the slime is converted into a light crude that can be refined in a traditional manner into gasoline, diesel and jet fuel. (Photo extracted from PNNL)


Friday 21 February 2014

Durisol ICF lowers the embodied energy of a dwelling.

Stuart Staniford at the Early Warning blogspot discusses the reduction in Embodied Energy a Durisol Foundaiton represents in a low embodied energy dwelling.  In his case study, the use of a Durisol ICF foundation over a conventional concrete foundation improved the "net carbon emissions" by 100%.

His analysis showed the the original carbon emissions associated with the foundation in the dwelling he modeled dropped from aprox 7.5 tons with no opportunity for sequestered carbon to just under 7 tons but now with the ability to also sequester close to 1.75 Tons.

Baseline with standard concrete foundations (http://earlywarn.blogspot.ca)
Utilizing Durisol ICF Block (http://earlywarn.blogspot.ca)

Sunday 26 January 2014

Rotting OSB - Why I refuse to perform rough-in construction during the winter!

I regularly go by a construction site where a friend of my neighbor is the G.C.   This house in out by the ferry terminal in West Vancouver and when done will be a very high cost home.

My latest visit reminded me of why I really do not want to expose my build to the winter rains.  In fact, I will try to keep all rain of the structure until closed in by installing a 60ft x 100ft tarp over a metal cable strung between two large trees.

But back to the visit, I have been visiting this property since before the old house got taken down, and in fact this is where I salvaged very nice cabinetry to use in the walk in closet, master bath, and family entrance as well as a new wall oven and a like new drawer dishwasher.  I also was able to salvage a lot of plant material from the property but so much more got left behind with the thinking it was out of the way, when in reality - they have just been trashed, such a shame.

Cabinet salvaged to be used in Master Bath

Gorgeous drawers and storage for Master Walk-In-Closet

Base cabinets to be used for family entrance
Wall cabinets to be used for family entrance
 But again I digress.  The new house has been under construction since the middle of May 2013.  The roof was installed sometime in December, but as of yesterday the majority of windows still have not been placed, and as the main floor living areas is 100% windows, the structure is very much NOT waterproof and has been subjected to many storm events leading to total saturation.  And the structure is starting to show its distress accordingly.  I noticed these symptoms a couple of weeks ago when there but was only able to return with a camera yesterday.


This dwelling is still at the rough in stage and is showing rather significant surface mould and rot fungi.  These OSB webs are now compromised **A conversation with someone much smarter than me indicated the webs should still be OK as long as this is dried out and cleaned off **.  Not only do I want to prevent this wetting with a tarped site, this is a perfect example of how poorly OSB stands up in wet environments.

 In the end, this will probably get cleaned up as the G.C. is quite conscientious, but normally, this would just get closed in and the occupants would wonder why their floors bounce a little more than they should.

Updated - Plumbing Design Complete - Not for the impatient!

Click here to view Completed 3D Plumbing Design - Updated

I plan on installing my own plumbing system in this house and am quite comfortable working with pipe.  However it had been several years since I had reviewed the plumbing codes and my memory from those days indicates there were a lot of rules regarding the sizing and routing of pipes!  So instead of talking the time to read and re-learn the code, I decided to contract out this part of the design.  I contacted an instructor of a BCIT 'Build your own house' course I had taken a few years back who provided the contact info for his son, a licensed plumber.


Richard Pugh  www.rpplumbing.ca 604-351-9145  Richard.pugh@rpplumbing.ca

I sent Richard off a set of preliminary drawings and asked if he could provide a plumbing isometric.  Now anyone who knows the plumbing business will understand that this is a strange request for a plumber and I was met with the expected hesitation.  Most residential plumbers do not draw out the system they install, and instead just complete a very rough plan, after the framing is complete, to allow for material ordering.  They then 'flesh' out the system as they are on site installing it.

If the designer (specifically those responsible for structural) has not taken into account the plumbing system, the plumber is left with some creative ways to route the pipes - especially the horizontal offsets and horizontal branch drains. And in some cases, with some plumbers that follow poorer practices, structure is modified to make room for the plumbing, compromising the stability of the structure (this seems to be rampant in the home renovation industry). In this conversation, it is important to remember that plumbers work in the world of 90º, 45º, and 22.5º fittings and all lines have to slope to drain.  If you have ever laid out a plumbing system, these constraints become front and center quite quickly and dramatically effect the routing of the pipes.

After a week or so, I met with Richard and went over his drawing markups. They identified the line routings and sizes and included key information like max change in direction between a water closet and its vent (225º) as well as the max distance between a WC flange and its vent (3m).  Everything looked great during our meeting review and I set off back to the office to fully flesh this plan out in my mind.


I have been using a program called Home Designer Pro to model the house in 3D and also create the plan views.  Unfortunately, this program does not include the functionality to add in plumbing.  So my Google search turned up a program called Quick Plumb (http://www.quickplumb.com/).  It had a 30 day free trial and a by month subscription after that.  The program showed a lot of promise, so I downloaded and started to model the layout that Richard had provided.  The program while easy to use on the surface, did have considerable challenges and only perseverance and patience provided a completed 3D plumbing model (I will give a full review of Quick Plumb at a later time).

Very quickly while starting the 3D modeling, I was able to see that some of what Richard had provided was not going to work, and I realized how difficult it is for plumbers to visualize a dwelling when only provided standard 2D floor plans.  The architectural 2D plans often provided do not typically identify the structural details like floor beams.  It is also difficult to visualize the alignment of each floor without a lot of measuring or being given some form of 3D model.

I unfortunately had not completed the structure at the time I had Richard start on the project so could not give him the structural drawings showing final beam placements. And I had no easy way to provide the Home Designer Pro 3D model to others.  So we had beams in the way of branches and stacks going through cavities reserved for pocket doors and similar interferences.  The pipe layout as drawn was just not going to happen.

SO I utilized the sizing and 'rules' presented in Richard's markup and set out to alter the layout to fit my structure.  In the end, I had to drop three beams in the basement (my beams are generally flush so concealed within the floor cavities) and re-space some floor trusses.  Fortunately, these beams could be dropped into either wall assemblies below, or into rooms that I did not mind having lower ceilings (like bathroom and sauna shower room in basement).  I also had to dramatically reroute the plumbing venting as I just did not have enough space in the floor assemblies for the drains AND vents to pass over each other (my cavities are 11-7/8" deep).

Richard still has to check over the resultant design, but I believe it is quite close to what I will end up with.  A 3D 'spin' of the design is available on my YouTube channel http://youtu.be/2aElBPP5Ryo.

Update: Richard went through and essentially 'approved' the plan.  I have updated the 3D spin to show the model now that I have also added in the required clean-outs.  The model still contains a code error (it was just too difficult to edit in the program). Can you spot it?

The design meets the following considerations:
  •  Basement will drain to a sump and then 'pump up' to the building drain that gravity drains to the Municipal sewer (note this is not how it is drawn. The software does not have functionality that allows for a pump up)
  • Upper two floors to gravity drain to Municipal sewer. 
  • Upper floor grey water lines will pass through a heat recovery device before exiting the building.
  • Toilets will drain separately from the rest of the system to accommodate a future grey water heat recover system upgrade and possible grey water filtering system to allow it to be reused in toilets.
As always - thanks for reading and I look forward to any comments you may have.

Friday 24 January 2014

January Update - Slowly we are proceeding.

I am getting a few questions as to where I am at on the build and so will provide this short update.

We are getting there! OK, that may have been too short.

Currently, we are waiting to hear if our development variance will be approved.  The notice went out to the neighbours between Christmas and New Years (Many Thanks to Erik at the District of North Vancouver for getting this out so quickly).  The neighbours had till Wednesday to respond with only one neighbour providing official comment (positive).  The next step is for staff to write the report to Council and for Council to deliberate on the application at the next available meeting.  This currently is scheduled for Feb 17 (I today found out it is too tight to make the Feb 3 meeting which is disappointing but totally understandable).

Back in November when I was discussing this Variance with staff, I was under the impression that they would allow me to apply for the building permit in advance of the Variance permit approval and proceed on the condition the variance is approved.  I found out this week, that I had it wrong, and that I cannot apply for the building permit until after, and if,  the variance has been accepted.  This news filled me with disappointment as I was budgeting 8-10 weeks for building permit approval based on previous conversations.  However, the kind District Plan Checker has advised they will do their best to fast track the application and could complete the process in as little as 2-4 weeks.  This would end up putting me slightly ahead of schedule.

The District staff have also confirmed I can apply for the demolition permit at any time.  This will again help, as regular readers remember, I plan to dismantle the existing dwelling by hand and reuse, sell, give away, or recycle/salvage as much of the materials as possible.  I estimated this process was going to take a month to complete.  Current plans are to move out the first few days in March, spend a couple of weeks dealing with all of 'my stuff' in the garage and attic and storage shed, and then start tackling the dismantling of items like flooring, cabinets, end the like, all stuff not controlled by a permit.  I would then schedule the services to be cut near the end of March and then start on the official 'demolition'.  These efforts would all take place in advance of the building permit and further improve my schedule.

I am also nearing completion with Tacoma, the structural engineers I hired.  This process has gone on longer than I believe both Tacoma and I expected, but we have made excellent progress and I believe are getting to the final drawing edits, having been through all the drawings at least once to date.  There has been a struggle with my desire for a thermal bridge free envelope and Tacoma's desire to ensure the dwelling stays standing for decades to come, that has been worked out with lots of 1 and 0's flying through the internet email pathways, and I am grateful for Tacoma and specifically Heather's patience through this process.  In the end, it is difficult (impossible?) to build a thermal bridge free structure utilizing 2x4 wall construction, and while complying with zoning requirements, and I have had to compromise in several areas in order to allow us to proceed with permit drawings in any reasonable time frame.  There are a few areas I will try to 'upgrade' after the permit process, but will only be able to do so if ROXUL is able to provide some compressive strength testing results for their insulation in a 6" wide configuration (what I will have as continuous insulation on the exterior of the sheathing).

As you recall I recently completed a proposed plumbing waste pipe design and am now waiting for the licensed plumber to approve or adjust as required.

I also recently commissioned EcoLighten Energy Solutions to complete a room by room heat loss calculation that I will then use to design my radiant panels.  I will speak to this a lot more in the future, but it is my feeling that the method I was taught as part of the TECA Residential Hydronic Designer course, is too crude for high performance homes.  I plan on doing a comparison between that which EcoLighten provides and that completed using the TECA method, and will post the differences here.  The preliminary model from EcoLighten shows that I will use around 50% of the energy used by a 'code built' home.  With the levels of insulation and air tightness I planned, this is actually a disappointing result, as I was hoping for something closer to a 70%+ reduction. I will go over the model in the upcoming weeks and see if there are any assumptions that can be tweaked to represent what I believe will be the final reality.

I have also commissioned HoneyComb Creative to build the project website.  HoneyComb created my home inspection website and were an obvious choice to approach for my build needs.  The website www.theEnclosure.ca should be 'live' in approximately 4-8 weeks with at least the basic functionality, and then will be fleshed out as the project proceeds.  The site will include 'live' video, time laps photographs,  a link to this blog, a daily project diary, special component installation videos, dwelling design details, sponsorship links with promotional literature for sponsored products, and finally information and basic instrument readings for the science lab (once the dwelling is complete).  I am looking forward to the site launch and have been very pleased with the initial artwork provided.

Well, I believe you are caught up.   I will be posting documents pertaining to the variance application and the permit application, including all drawings, as I get through those hurdles.

As always, thanks for reading!  Please drop me a line if you have any questions or comments.